What's in the box
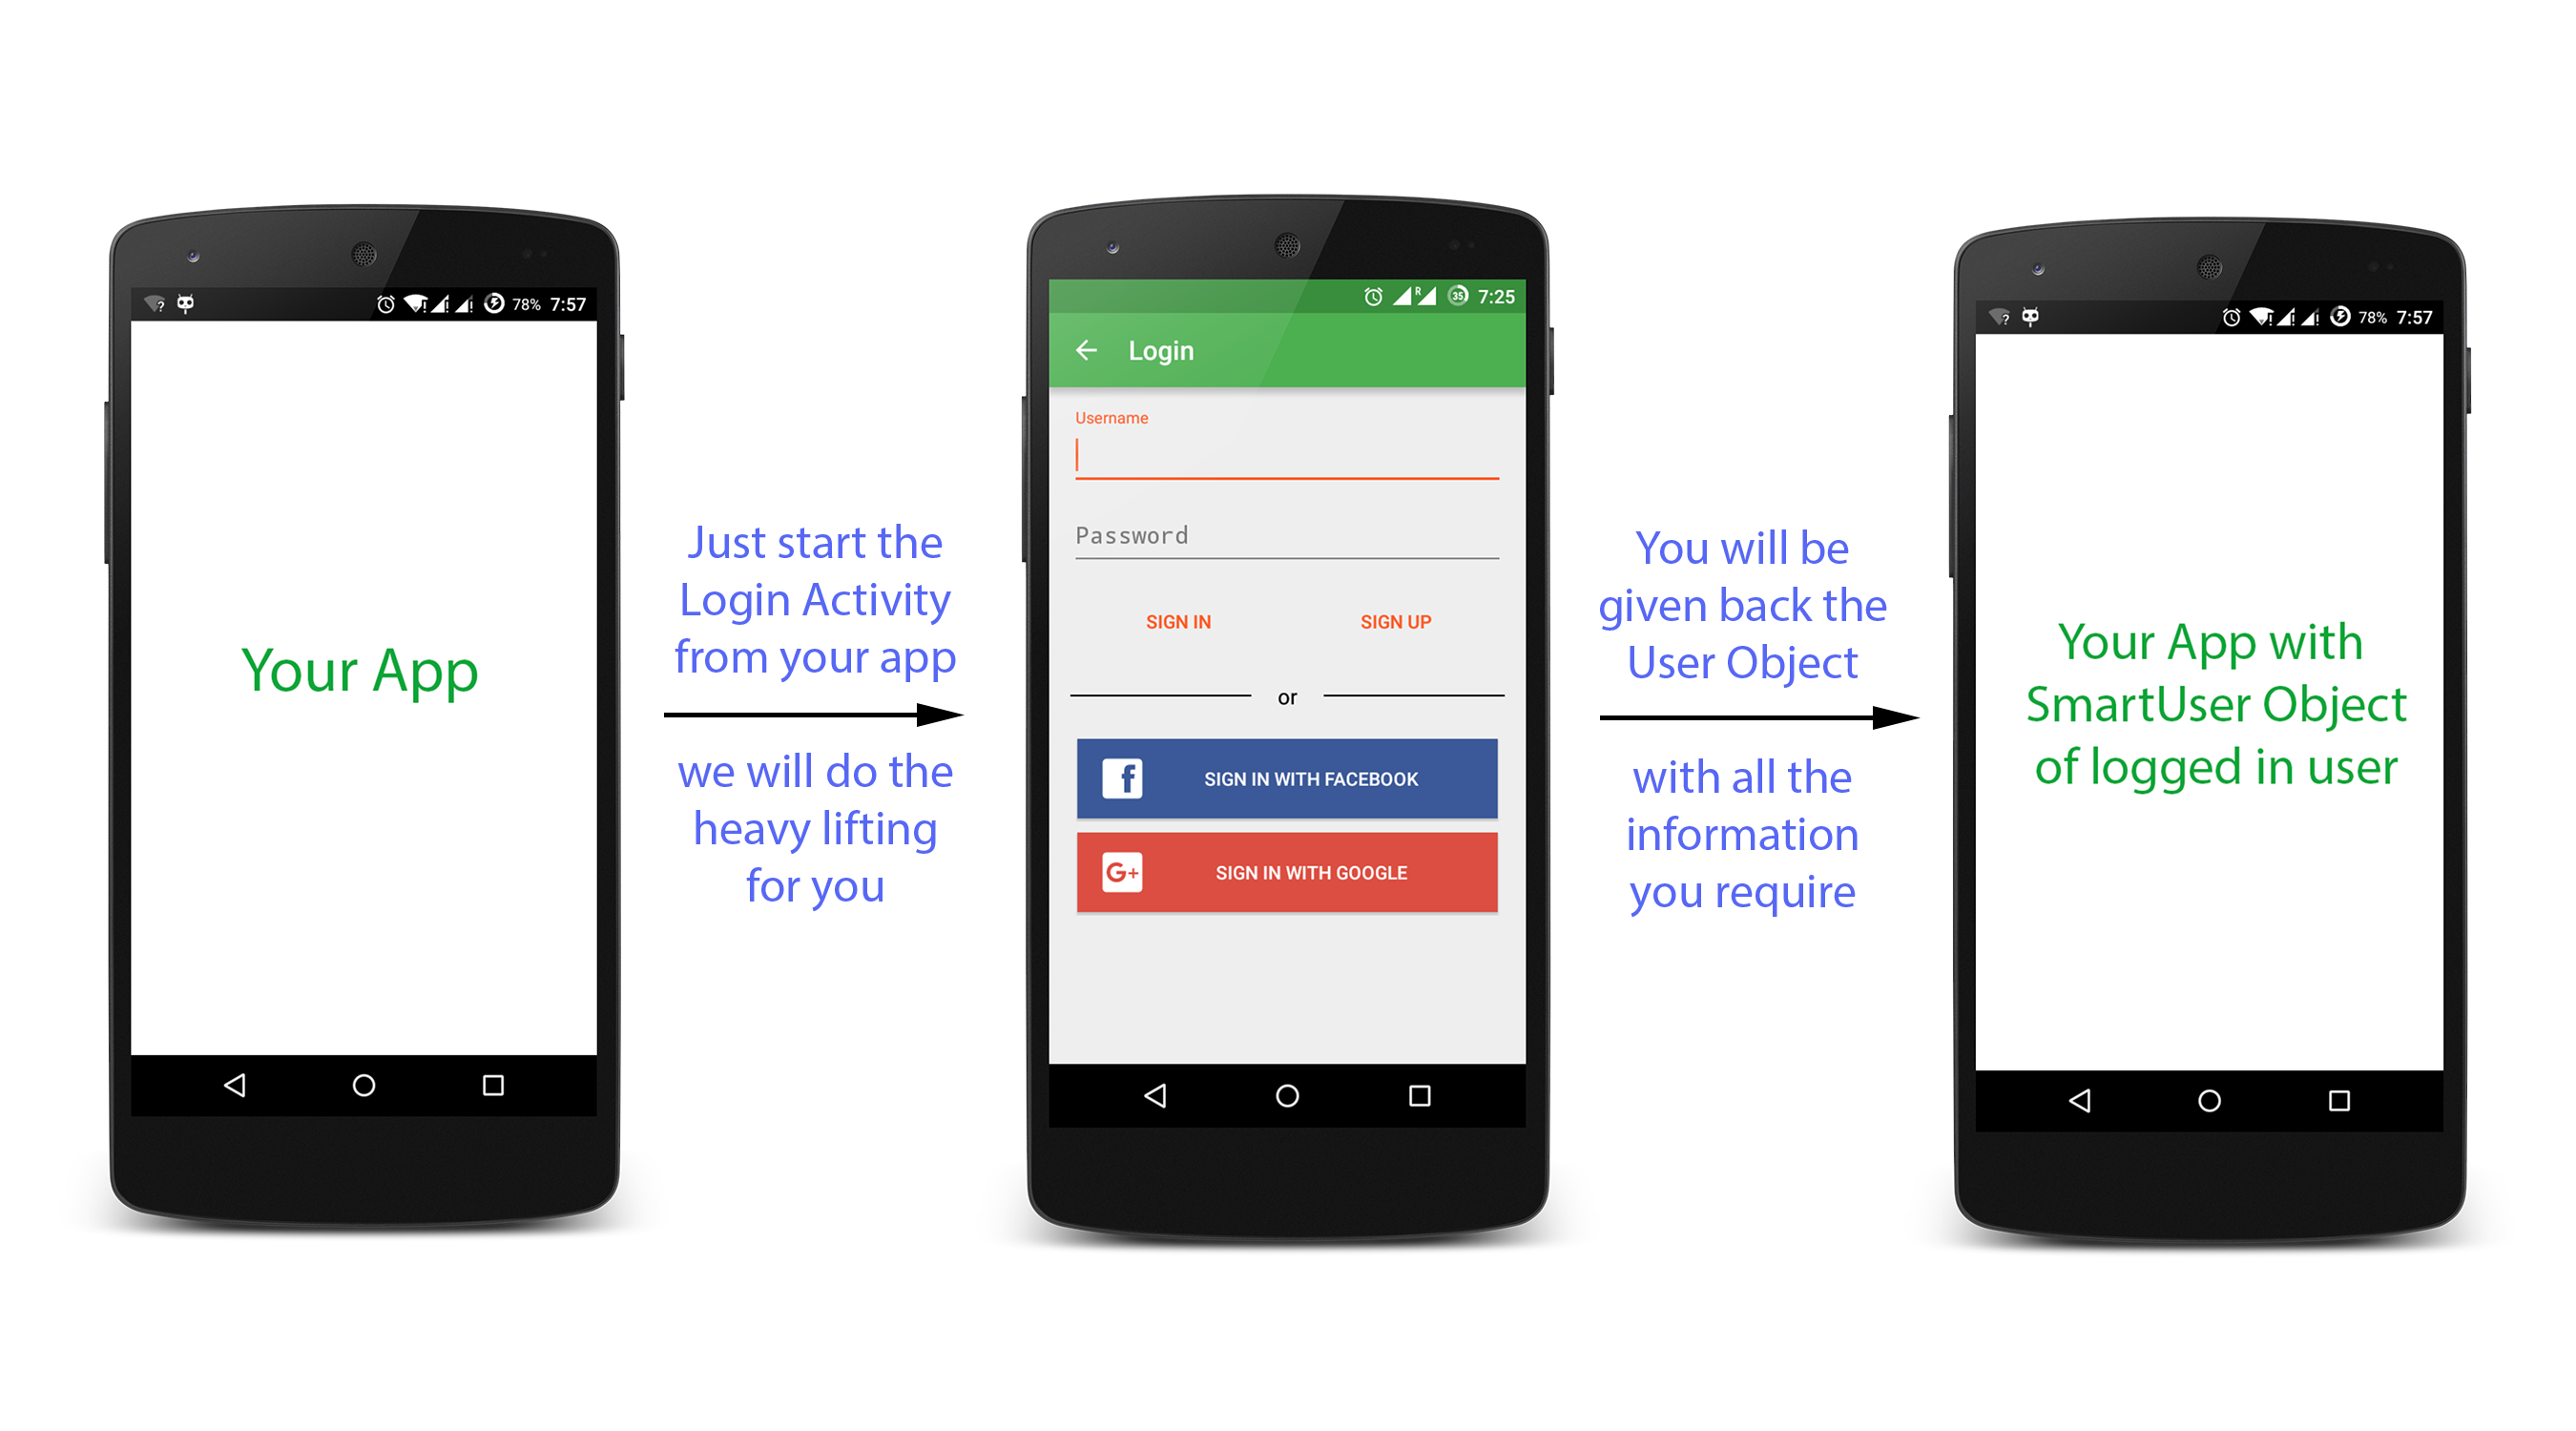
- A material designed login page
- Implementation of Facebook and Google login
- Easy way to implement custom login and sign up
- Smart and easy way to apply the flow with SmartUser
- Customizable login screen (more customization will be available in upcoming versions)
Setup
1. Get the library from here Download
Since it's in beta, decided not to put it in Maven Central. Will provide the gradle dependency from the first release. So for now please add the library as a module to your project.
2. Add the AAR as a module dependency to your app.
You can do this by clicking File -> New -> New Module... Then choose "Import .JAR/.AAR package" option and the add the downloaded aar file as a dependency. Since we implemented Facebook and Google login for you, it is necessary to add the following dependencies in your app/build.gradle
    //Support libraries
    compile 'com.android.support:appcompat-v7:23.0.1'
    compile 'com.android.support:design:23.0.1'
    //Facebook SDK
    compile 'com.facebook.android:facebook-android-sdk:4.0.1'
    //Google Play Services
    compile 'com.google.android.gms:play-services:8.1.0'
    //GSON library
    compile 'com.google.code.gson:gson:2.3.1'
We used
- Support Library for maintaining compatibily of material design
- Facebook SDK and Google Play Services are necessary as we implemented social logins
- GSON library is must for now as we used it to set user sessions
3. Start the LoginActivity
    Intent intent = loginBuilder.with(context)
                        .setAppLogo(APP_LOGO)
                        .isFacebookLoginEnabled(true).withFacebookAppId("APP_ID")
                        .withFacebookPermissions(PERMISSIONS)
                        .isGoogleLoginEnabled(true)
                        .build();
    startActivityForResult(intent, SmartLoginConfig.LOGIN_REQUEST);
Don't forget to add the following in the manifest
    <uses-permission android:name="android.permission.INTERNET"/>
    <!-- Required for Google Login -->
    <uses-permission android:name="android.permission.GET_ACCOUNTS" />
    <uses-permission android:name="android.permission.USE_CREDENTIALS" />
    <!-- In application tag (Need to register the Login activity in your app) -->
    <activity
            android:name="studios.codelight.smartloginlibrary.SmartLoginActivity"
            android:theme="@style/AppTheme" />
    <activity android:name="com.facebook.FacebookActivity"
            android:configChanges=
                "keyboard|keyboardHidden|screenLayout|screenSize|orientation"
            android:theme="@android:style/Theme.Translucent.NoTitleBar"
            android:label="@string/app_name" />
Config
-
APP_LOGO - Integer - Optional - Send your logo to display on the login page
Facebook Login setup
- APP_ID - String - Needed if Facebook login is enabled - App ID of your app on facebook
-
PERMISSIONS - ArrayList - Needed if Facebook login is enabled(if not specified default permissions are taken) Permissions for Facebook Login Learn more
Google Login setup
- Just enable Google login by passing true to isGoogleLoginEnabled method
- Before that, you need to configure your app in Google Developers Console and get the Configuration File. Learn more about Google sign in
- Place the configuration file in the app/ directory and that's it
4. Get back the logged in User
From the intent that you passed, Login Activity will be started. Based on user interaction, it will send back the result code along with SmartUser object(if login is successful). Hence you can catch the SmartUser object in onActivityResult method
For example
    @Override
    protected void onActivityResult(int requestCode, int resultCode, Intent data) {
        //Intent "data" contains the user object
        if(resultCode == SmartLoginConfig.FACEBOOK_LOGIN_REQUEST){
            SmartFacebookUser user;
            try {
                user = data.getParcelableExtra(SmartLoginConfig.USER);
                //use this user object as per your requirement
            }catch (Exception e){
                Log.e(getClass().getSimpleName(), e.getMessage());
            }
        }else if(resultCode == SmartLoginConfig.GOOGLE_LOGIN_REQUEST){
            SmartGoogleUser user;
            try {
                user = data.getParcelableExtra(SmartLoginConfig.USER);
                //use this user object as per your requirement
            }catch (Exception e){
                Log.e(getClass().getSimpleName(), e.getMessage());
            }
        }else if(resultCode == SmartLoginConfig.CUSTOM_LOGIN_REQUEST){
            SmartUser user = data.getParcelableExtra(SmartLoginConfig.USER);
            //use this user object as per your requirement
        }else if(resultCode == RESULT_CANCELED){
            //Login Failed
        }
    }
voila! that's it. You now have the entire user login functionality in your app
5. Implementing custom user login and sign up
Get more out of the library by easily implementing your logic to login and sign up the users. For this all you need to do is implement the following code
        SmartCustomLoginListener loginListener = new SmartCustomLoginListener() {
            @Override
            public boolean customSignin(SmartUser smartUser) {
                //do something with smartUser
                if(SUCCESS){
                    return true;
                } else {
                    return false;
                }
            }

            @Override
            public boolean customSignup(SmartUser smartUser) {
                //do something with smartUser
                if(SUCCESS){
                    return true;
                } else {
                    return false;
                }
            }

            @Override
            public boolean customUserSignout(SmartUser smartUser) {
                //do something with smartUser
                if(SUCCESS){
                    return true;
                } else {
                    return false;
                }
            }
        };
Next pass that loginListener into setSmartCustomLoginHelper method of loginBuilder
Intent intent = loginBuilder.with(context)
        .isCustomLoginEnabled(true).setSmartCustomLoginHelper(loginListener)
        .build();
startActivityForResult(intent, SmartLoginConfig.LOGIN_REQUEST);
How it works

Other Features
Get the current logged in user at anytime from your application by just calling UserSessionManager.getCurrentUser method
SmartUser currentUser = UserSessionManager.getCurrentUser(context);
if(currentUser != null){
    //You have got what you need
}
Contibution
I would love to welcome everyone of you to contribute to this project and make it better. If you feel the LoginPage is not looking great (I know, I am not a great designer), feel free to design and make it better if you think its necessary. Encounter any issue? Don't hesitate to open an issue
Convention I would like to follow: Master branch would be the development branch. So feel free to fork from the Master branch. Release branch will be merged with master branch after every major release.
License
Copyright 2015 Codelight Studios

Licensed under the Apache License, Version 2.0 (the "License");
you may not use this file except in compliance with the License.
You may obtain a copy of the License at

   http://www.apache.org/licenses/LICENSE-2.0

Unless required by applicable law or agreed to in writing, software
distributed under the License is distributed on an "AS IS" BASIS,
WITHOUT WARRANTIES OR CONDITIONS OF ANY KIND, either express or implied.
See the License for the specific language governing permissions and
limitations under the License.